

Key Takeaways
- Water damage often announces itself through subtle visual clues long before structural harm sets in.
- Walls, ceilings, basements, and window frames are the highest-priority areas to inspect regularly.
- A musty odor without visible mold is a reliable sign of hidden moisture accumulation.
- Catching water intrusion early can prevent thousands of dollars in remediation and renovation costs.
- Some findings warrant immediate professional evaluation, especially near electrical panels or structural framing.
What you will need
Why Early Detection Matters
Water is patient and persistent. What begins as a slow drip behind a wall or a hairline gap in window caulk can quietly compromise insulation, rot wood framing, and cultivate mold colonies for months before a homeowner ever notices. By the time damage is obvious — a stained ceiling, a warped floor, paint peeling in sheets — the underlying problem may already involve structural elements that are far costlier to address than the original source.
The good news is that water intrusion almost always leaves early clues. Learning to read those clues during regular walkthroughs puts you in a position to act when repairs are still small. This guide walks through a systematic room-by-room inspection any homeowner can perform. For context on how water damage can escalate into full renovation territory, our home renovation glossary can help you understand the terminology contractors use when scoping that kind of work.
Inspect After Heavy Rain or Snowmelt
The best time to walk your home's interior for moisture signs is within 24 to 48 hours after a significant rain or spring snowmelt. Stress-test conditions reveal intrusion points that may be invisible in dry weather. Make it a seasonal habit alongside your HVAC filter changes.
What You'll Need Before You Start
This inspection requires no specialized training, but having the right tools on hand makes the difference between a thorough check and a superficial glance. Gather everything before you begin so you can move efficiently from room to room.
Flashlight or Headlamp
Illuminates dark corners, crawlspaces, and cabinet interiors where staining or mold is easy to miss.
Moisture Meter
Detects elevated moisture levels inside walls and floors without requiring you to open them up.
Screwdriver or Awl
Used to probe soft or spongy wood around window frames and baseboards for rot caused by prolonged moisture exposure.
Notepad or Smartphone
Document findings with photos and notes so you can track changes over time or share them with a contractor.
What you will need
If your home has an attic, include it in your route — roof-related leaks often show their earliest signs in attic insulation or sheathing before anything is visible on interior ceilings below.
Step-by-Step Inspection Walkthrough
Follow these steps in order, starting from upper floors and working your way down to the basement or crawlspace. This sequence ensures you trace water's natural path through the home rather than chasing symptoms in isolation.
Gather your tools and plan your inspection route
Before you start, collect a flashlight, a screwdriver or awl, and your smartphone for photos. Walk your home's floor plan mentally and identify every room that has an exterior wall, a bathroom above or below it, or a window. These are your highest-risk zones. Start at the top floor and work downward — water follows gravity, so damage often originates above where you first notice it.
Inspect ceilings and upper wall sections
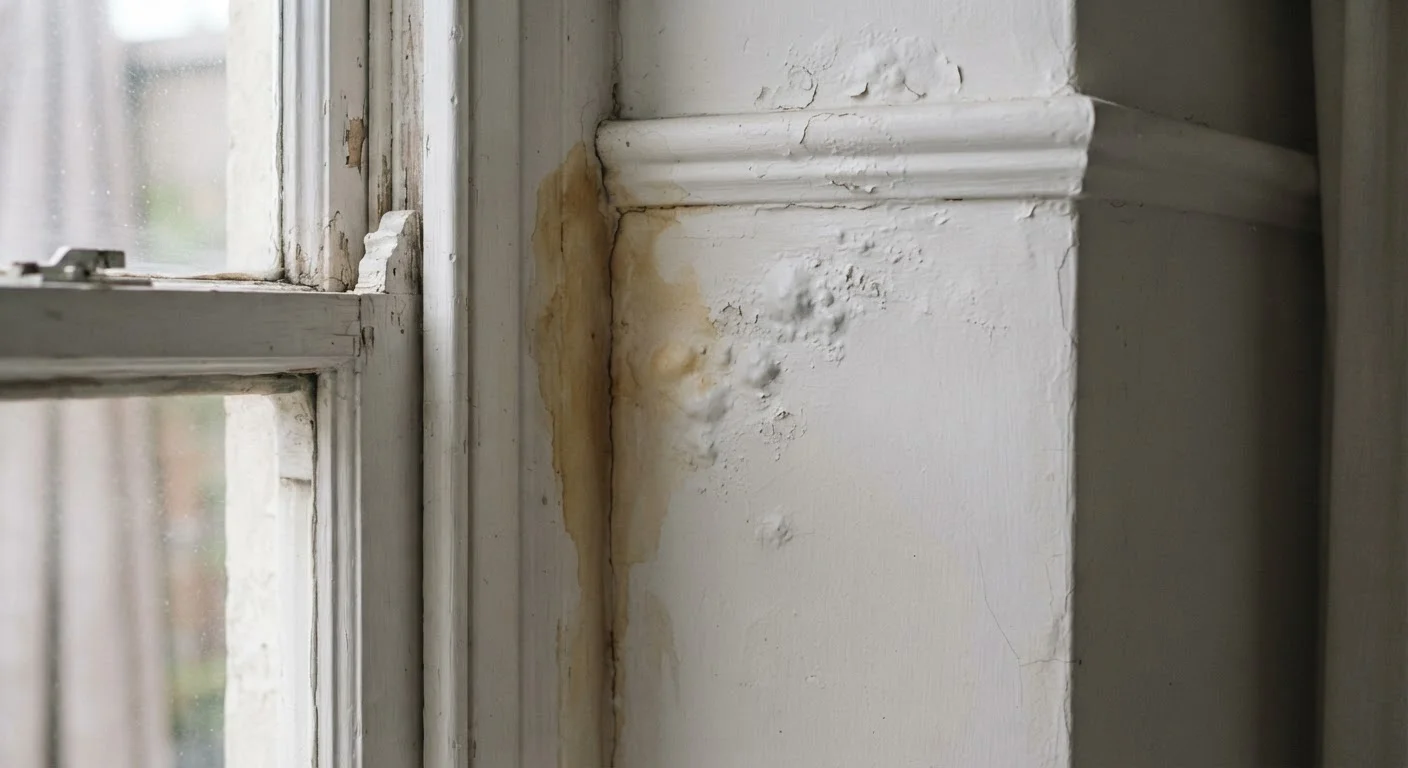
Look for discoloration ranging from pale yellow to dark brown rings — these are classic signs of dried water that has evaporated and left mineral deposits behind. Pay special attention to ceiling corners and areas directly beneath bathrooms or roof valleys. Press gently on any discolored drywall; soft or spongy texture indicates active or recent saturation. Bubbling or peeling paint on a ceiling is especially telling.
Check walls around windows and exterior doors
Window frames and door thresholds are among the most common water entry points in a home. Look for paint that is chalky, cracked, or pulling away from the wall near the frame. Use your screwdriver or awl to gently probe wood trim and sill surfaces — wood that yields easily or feels soft has likely been wet repeatedly. Check both the interior and exterior sides of every window and door, and inspect the caulk bead for cracks or gaps.
Examine baseboards and lower wall sections
Baseboards that are warped, discolored, or pulling away from the wall often signal moisture wicking up from a slab or coming through the foundation. Flooring adjacent to exterior walls — especially hardwood or laminate — may show cupping, bubbling, or a musty odor when you kneel close to it. Pull back area rugs and check beneath them in rooms that sit on slab foundations or over a crawlspace.
Inspect the basement and crawlspace
Take your flashlight into the basement and scan the base of all walls where they meet the floor — this joint is a common pathway for groundwater intrusion. White or gray powdery deposits (called efflorescence) on concrete or block walls indicate that water has been moving through the masonry and depositing minerals as it evaporates. Check floor joists and sill plates (the wood sitting directly on the foundation) for staining, soft spots, or visible mold. For a thorough basement moisture overview, see our guide to basement moisture and warning signs.
Use your nose as a diagnostic tool
A persistent musty or earthy smell in a room — especially one that intensifies after rain — is a reliable indicator of hidden moisture or mold growth even when no visual damage is apparent. This smell is produced by microbial volatile organic compounds (mVOCs) released by mold colonies. Don't dismiss it as normal. Open the area up for investigation: check inside closets, behind furniture against exterior walls, and inside lower cabinets under sinks.
Document findings and decide on next steps
Photograph every area of concern with a timestamp. Note whether staining appears old and dried versus still damp. For minor issues — a hairline crack in caulk, a small dry stain from a resolved leak — you may be able to monitor and address them yourself once you've confirmed the source is corrected. For anything involving active moisture, significant staining, soft framing, or mold, bring in a licensed contractor or water remediation professional for an assessment before any cosmetic repairs begin. If water damage has been extensive, it's worth reviewing what renovation work may lie ahead; our kitchen remodel planning walkthrough illustrates the kinds of scope and cost decisions that follow significant repairs.
Stop and Call a Pro for These Signs
If you discover sagging drywall or ceilings, visible black or green mold colonies, or water damage near your electrical panel or breaker box, do not attempt to investigate or repair these yourself. These situations can involve structural compromise or electrocution risk. Contact a licensed contractor or remediation specialist before proceeding.
If your inspection reveals damage concentrated near bathrooms, review our common bathroom renovation myths — many stem directly from waterproofing failures that go undetected for years.
Don't Mask Moisture With Paint or Caulk
Applying fresh paint or caulk over a damp surface traps moisture and accelerates deterioration behind the wall. Always confirm an area is fully dry and the source of water has been corrected before any cosmetic repair. Covering an active leak leads to mold growth and can void certain homeowner insurance claims.
When to Call a Professional
Not every finding requires a contractor. Dried staining from a leak that was fixed years ago, minor efflorescence on an otherwise dry foundation wall, or a small gap in exterior caulk are things many homeowners can evaluate and address themselves. However, several findings should prompt a professional assessment without delay:
- Active moisture or dripping with no identifiable shutoff point
- Soft, spongy, or visually deteriorated structural wood (joists, sill plates, rafters)
- Any visible mold colony larger than a few square inches, especially on framing or insulation
- Water intrusion near electrical panels, outlets, or wiring
- Efflorescence combined with visible wall cracking in a basement
A licensed general contractor or a certified water remediation specialist can scope the work, identify the source, and advise on whether permits are required for repair — which they often are for structural or plumbing-adjacent work. Understanding what's load-bearing before any wall is opened is also essential; our article on load-bearing walls explains what contractors assess before cutting into framing.